For the complete documentation index, see llms.txt. This page is also available as Markdown.

Workflow and Queue

This is a quick guide on what Workflow and Queue are built to do, how they work, and a summary of available actions. We will regularly update this whenever new features are released.

question

Why migrate to Workflow and Queue?

What is Workflow

Workflow is the clinic flow builder in Dashlabs. It allows users to map out their clinic's stations and the order that patients are expected to move through them. Once set up, Workflow drives Queue automatically, which can route patients from one station to the next with little manual intervention.

How to Set Up Workflow

Workflow is set up by the Dashlabs team for users upon onboarding to the system. Users will need to share their clinic flow with the Dashlabs team, including expected stations ("Queue Servers") and patient services that each station should cover. Any changes to a clinic's workflow should be directed to the respective Dashlabs relationship manager or customer support.

How to Navigate Workflow

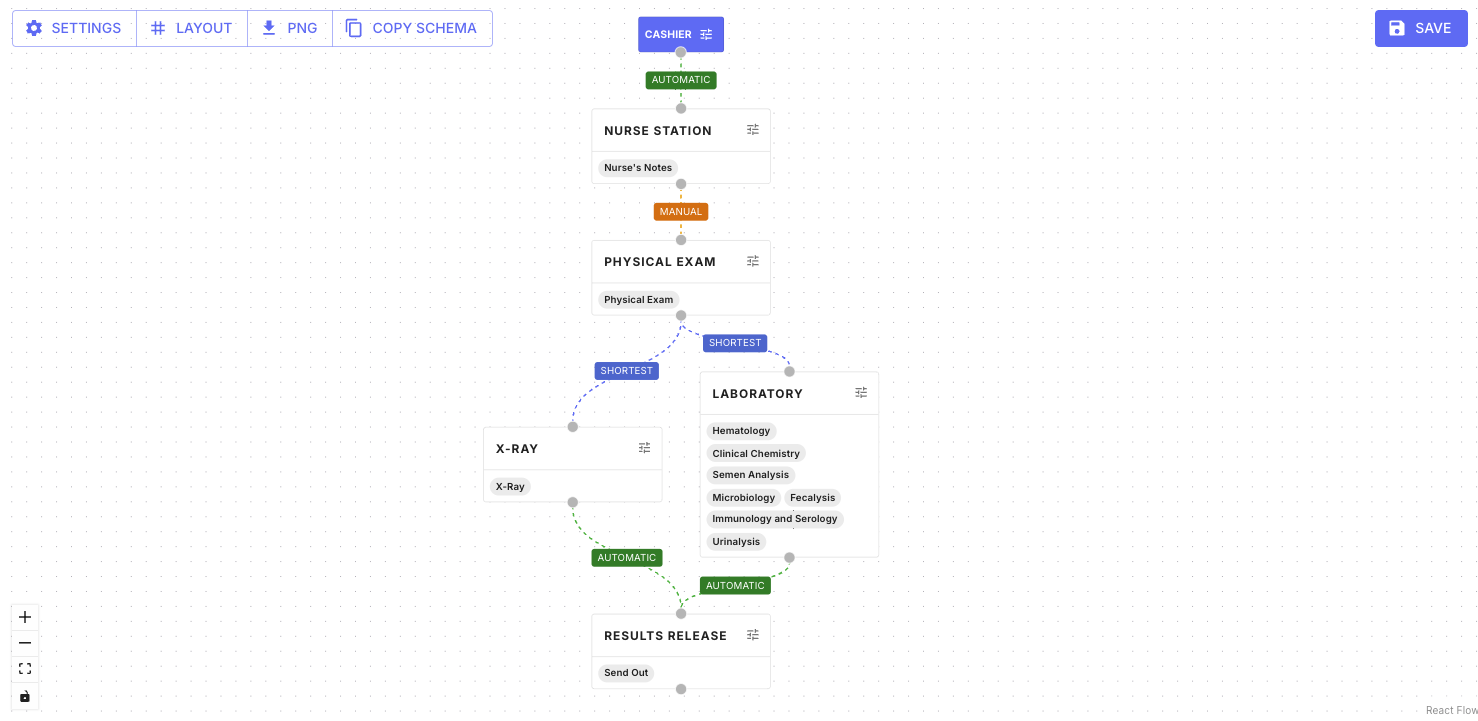
Workflow is represented as a flowchart in Dashlabs. Each card represents a queue server, or clinic station, and can support multiple patient services. Each queue server is related to another using connections.

Connections from one queue server to the next operate differently:

Connection type
Looks like
Function

Automatic

Patient is automatically moved to the next queue server as WAITING status upon completion of current queue.

Manual

Patient is sent to the next queue server as NOT READY and must be manually set to WAITING.

Shortest

Patient is automatically queued as WAITING in the shortest queue, and NOT READY in all other upcoming queues.

Intersection

Patient proceeds only when multiple required queues are completed or ready simultaneously.

Concurrent

Patient is queued as WAITING in all upcoming queues; once one queue starts SERVING, the rest revert to NOT READY.

What is Queue

Queue is the patient processing workspace in Dashlabs. It is designed to be the one page where users can manage, track, and complete all tasks for every patient encounter: from the moment a patient arrives at a station to the moment their services are completed.

How to Start Using Queue

  1. Set up your workspace with the Dashlabs team For every queue server or clinic station, users should identify the list of actions they need to be able to do. Dashlabs team will set up the queue workspace based on the list of actions. This only needs to be done once.

  2. Find your patient Use the search bar or scroll the queue work list (left pane). Priority-tagged and active patients will appear at the top of the list.

  3. Select and serve Click a patient card to expand their record in the action pane (right pane). Update the status to Serving when you begin.

  4. Complete actions Use the relevant widgets in the right-side action pane to input results, verify information, amend orders, and more.

  5. Mark as complete When done, click Mark as Complete. This routes the patient to their next station. This step is important as routing is not automatic just because results are saved.

How to Navigate Queue

Queue uses a split-pane layout. Both panes scroll independently.

  • The left pane is the queue work list, which is a list of patients to be processed. Each patient is considered one queue task.

  • The right pane is the action pane, where actions can be completed for the patient.

Feature
Looks like
What it is

Call button

If using the Queue board, this calls the patient's queue number. If not using the Queue board, click this to start serving the patient, then manually call for the patient. Clicking this button will change status to “Serving". This button is disabled as long as the queue status is not “Waiting”.

Statuses

This shows the status of a particular queue. Not ready: Patient is not yet ready to be called or served. Waiting: Patient is ready to be served. Serving: Patient is currently being served. Complete: Patient has completed the station. If an order is cancelled, the respective queue tasks will also be automatically cancelled.

Time elapsed and status

This shows how long the patient has been updated to a status. In this example, patient has been at “Waiting” status since 2 days ago.

Clinic presence check

This shows if the patient has started being processed through the workflow, so they are tagged as “in clinic”. If they have not yet started the workflow, they are tagged as “not in clinic”.

Patient service status in queue work list pane

This shows the status of the patient services. Some statuses can include: Created: Patient service has been created Completed: Results have been saved and locked Results created: Results have been saved but not yet locked

Calendar view

View queue work list as in calendar mode to see all upcoming scheduled patients. This works best if you have scheduled appointments, instead of walk-in.

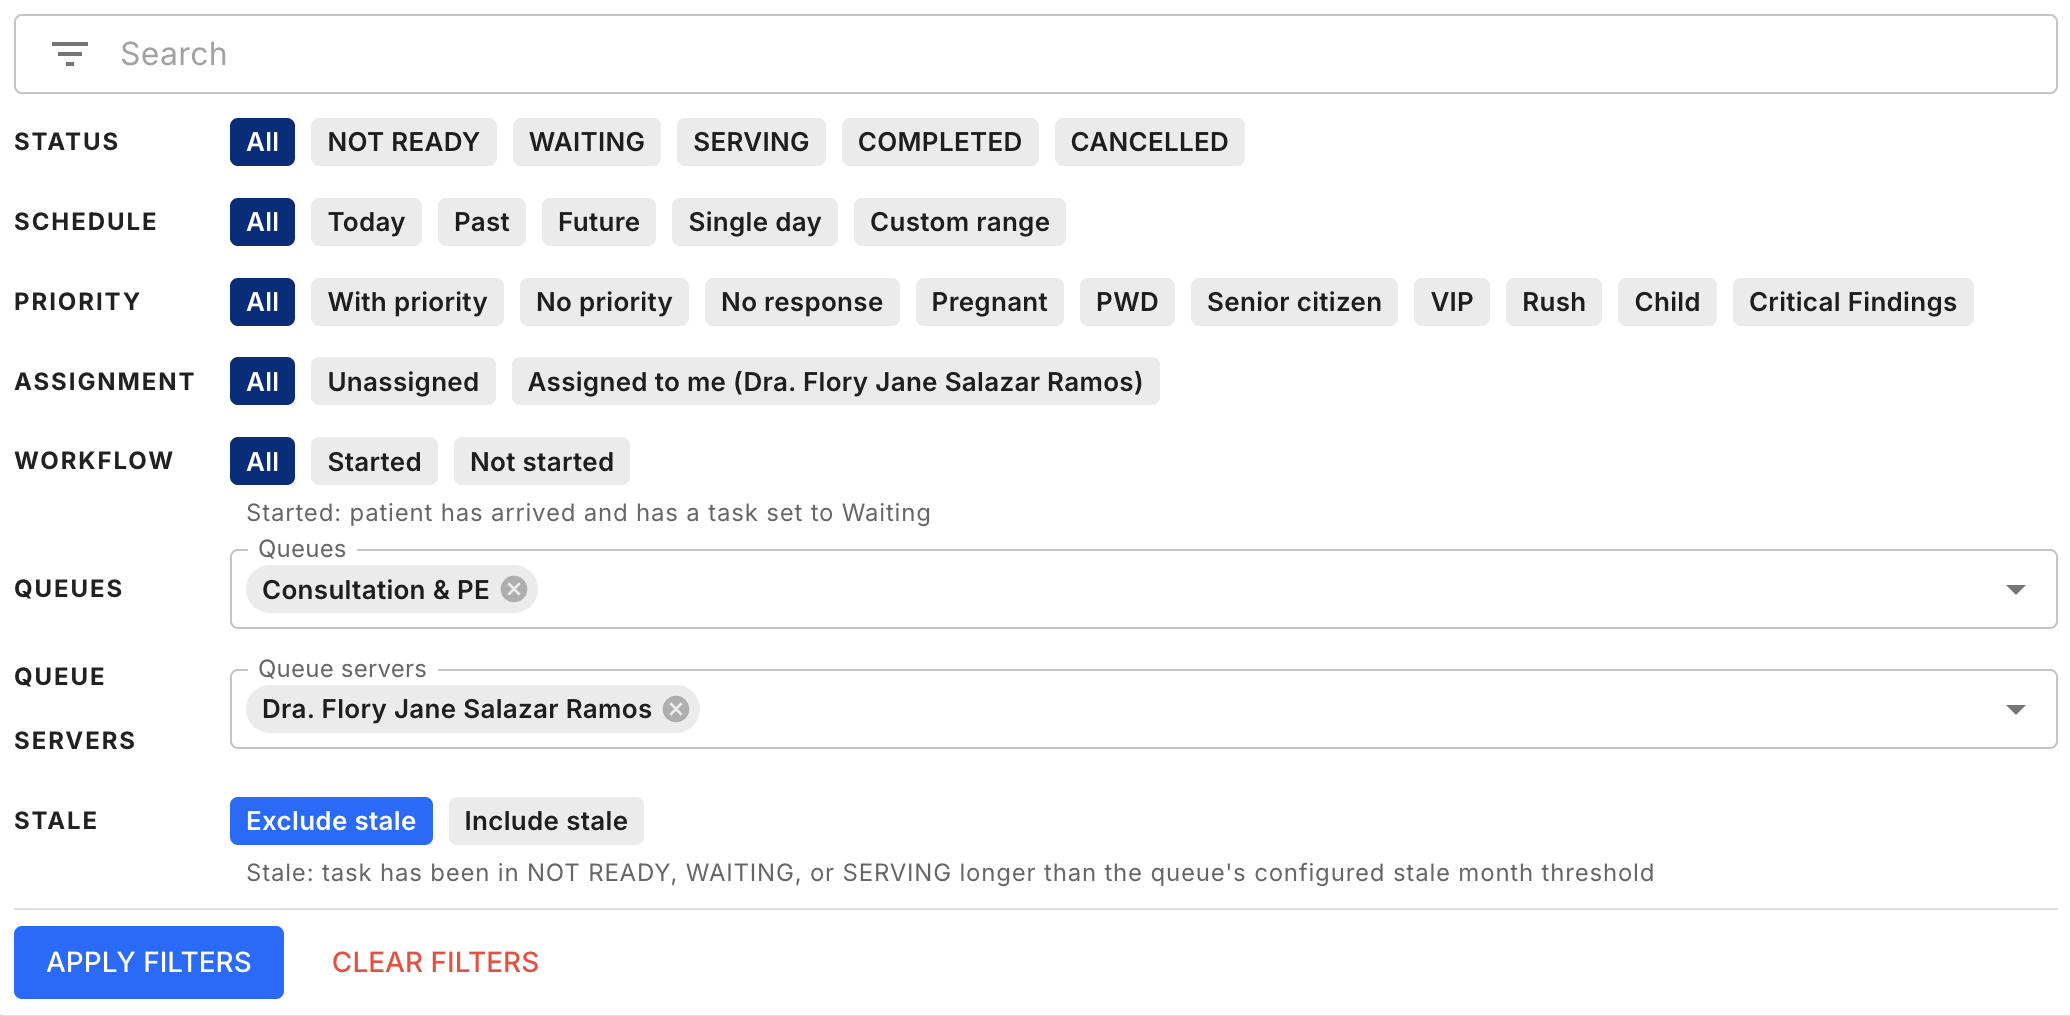
Filter

Filter the queue work list to surface patients most relevant to you.

Patients can be filtered and searched in the queue work list pane.

  • Filters will stay if the user remains on the same page and refresh.

  • However, if users open queue on a new browser window or tab, the filters will reset.

  • We are still working on setting up “default” filters.

Filter
What it does

Status

Filters based on the status of the queue or patient

Schedule

Filters based on time: Today – All patients with a schedule for today Past – All patients with a schedule from yesterday and older Future – All patients with a schedule in the future from now Custom range – Add specific date

Priority

Filters for patients with any or specific priority tagging

Assignment

Filters based on who the patient is assigned to

Workflow

Filters based on patients that have started being processed through workflow (considered “In clinic”) or have not started (considered “Not in clinic”)

Stale

Filters patients where status was last updated over six months prior

Action Widgets

Widgets are actions that can be done on the right-side action pane. Widgets are customizable and can be added, removed, or reordered across different queue servers or clinic/lab stations.

  • Note: Users cannot customize the queue set up yet.

  • In the meantime, if users would like to update their queue set up, they should reach out to their Dashlabs relationship manager or customer support.

Widget
What it does

Patient Information View

View patient details only (E.g. Name, age)

Patient Information

View and edit patient details

Patient Services

View, expand patient services and statuses that are related to current queue

All Patient Services

View, expand all patient services and statuses in patient's order

Patient Services Result

Input results for patient services

Logs

See edit/update history and see who made changes

Workflow

View the current queue in your workflow to see past and future queues

Collected At

View and update timestamps for specimen collection

Barcodes

View and print barcodes

Download Documents

Download relevant documents Select these in the queue settings page

Action Tasks

Complete generic actions such as send out to email, upload to Google Drive These actions must be set up in Actions & Triggers

Action Tasks Logs

Show timestamps of when action tasks were last triggered and by who

All Queues

Show all queues in the workflow with respective statuses, update queue servers for queue tasks

Next Queues

Show only upcoming queues in the workflow with respective statuses, update queue servers for queue tasks

Order

View patient’s order and access order page

Order Documents

Download order-related documents such as routing slip, receipts

Partners

Complete partner-specific actions such as release to portal If the organization did not opt into partners module, this will be empty
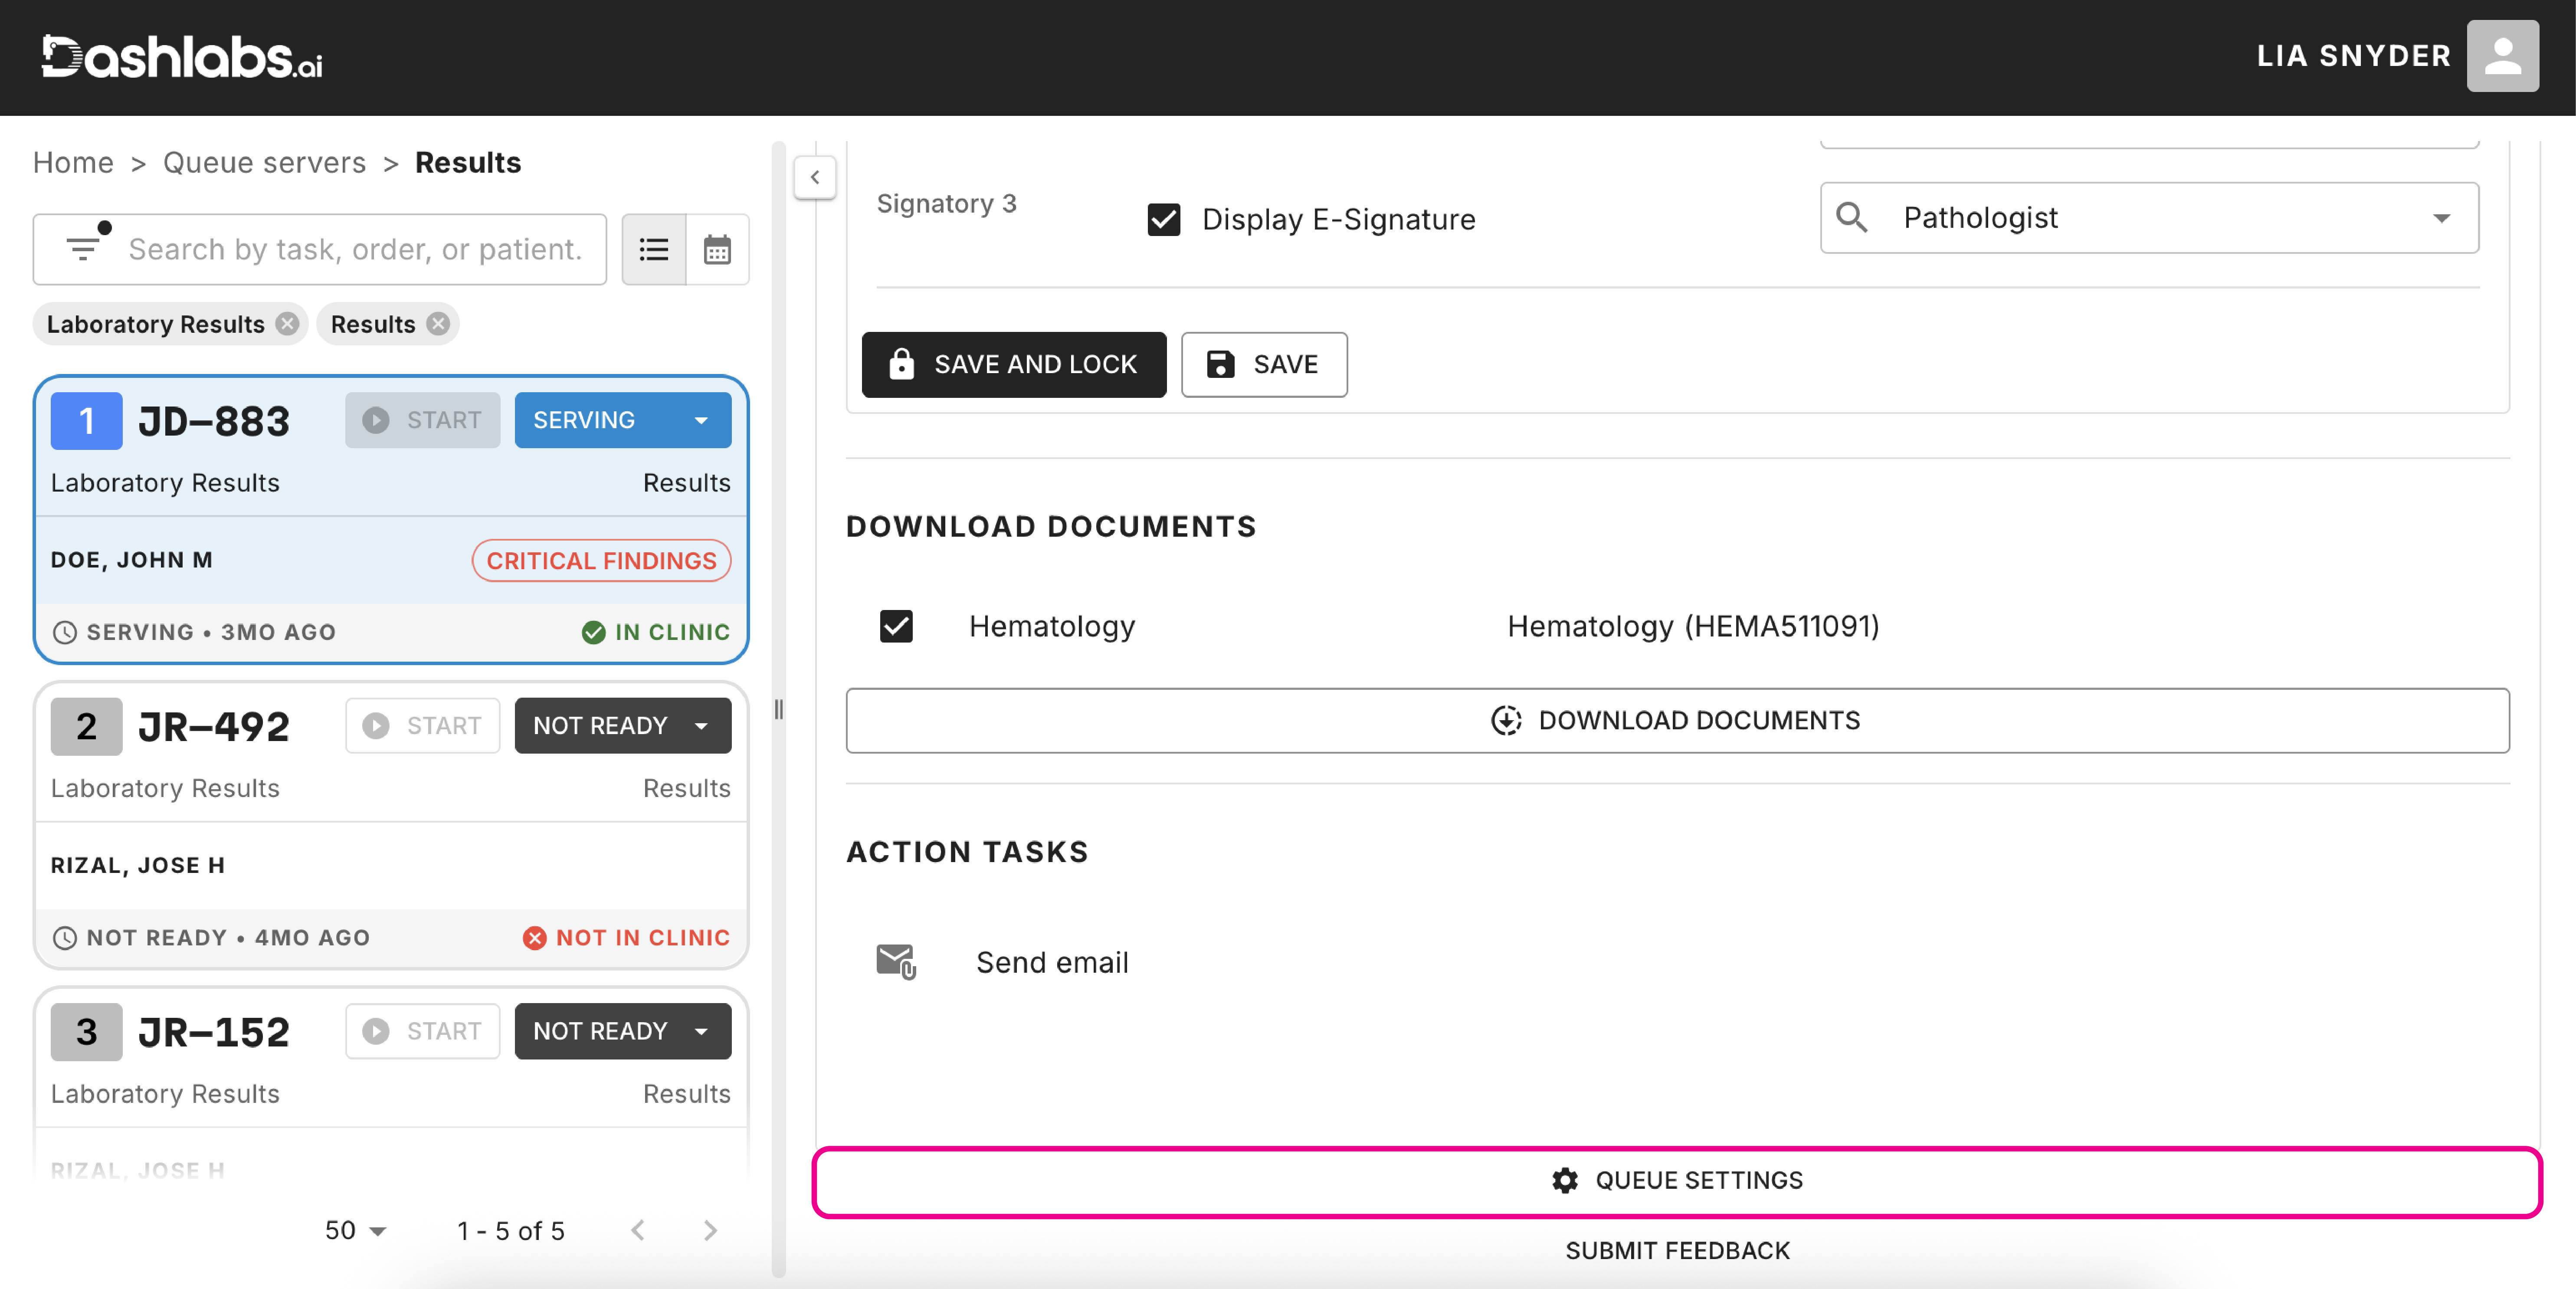
Queue Settings Page

This feature is currently limited to Dashlabs Team. For any changes to set up, users should reach out to their relationship manager or customer support.

The Queue settings page can be accessed by scrolling to the bottom of any expanded queue task.

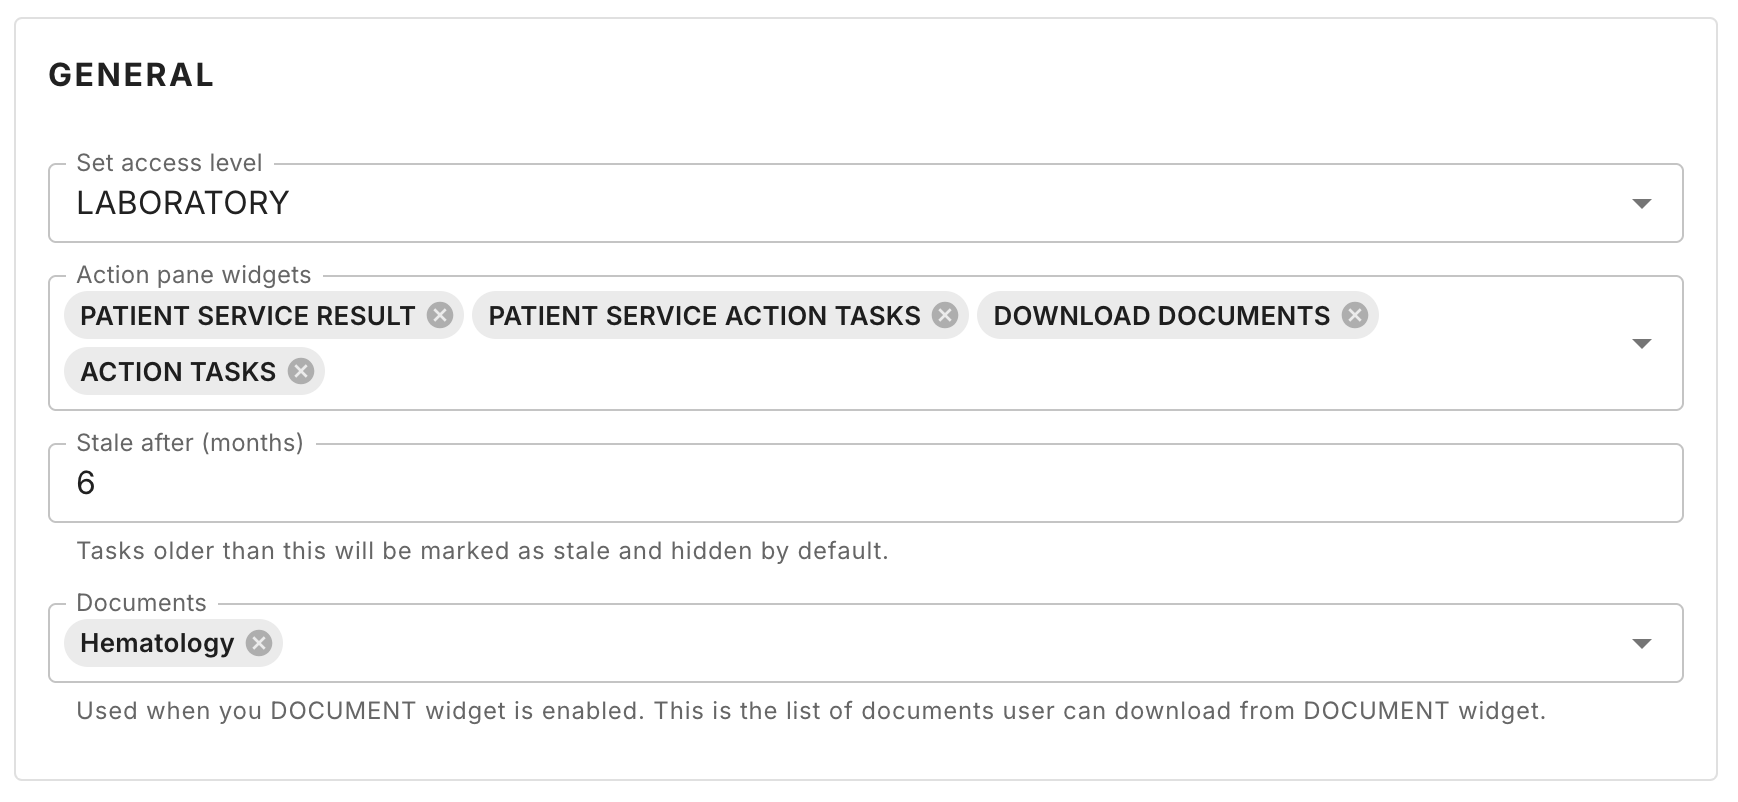
General

  • Set access level: Determine which user groups can access this queue server

  • Action pane widgets: Choose which action widgets will show in the action pane, and in what order

  • Stale after (months): Set the time period required to mark a queue task as "stale" - this allows users to quickly filter out old records

  • Documents: Indicate which documents can be downloaded in the Document action widget

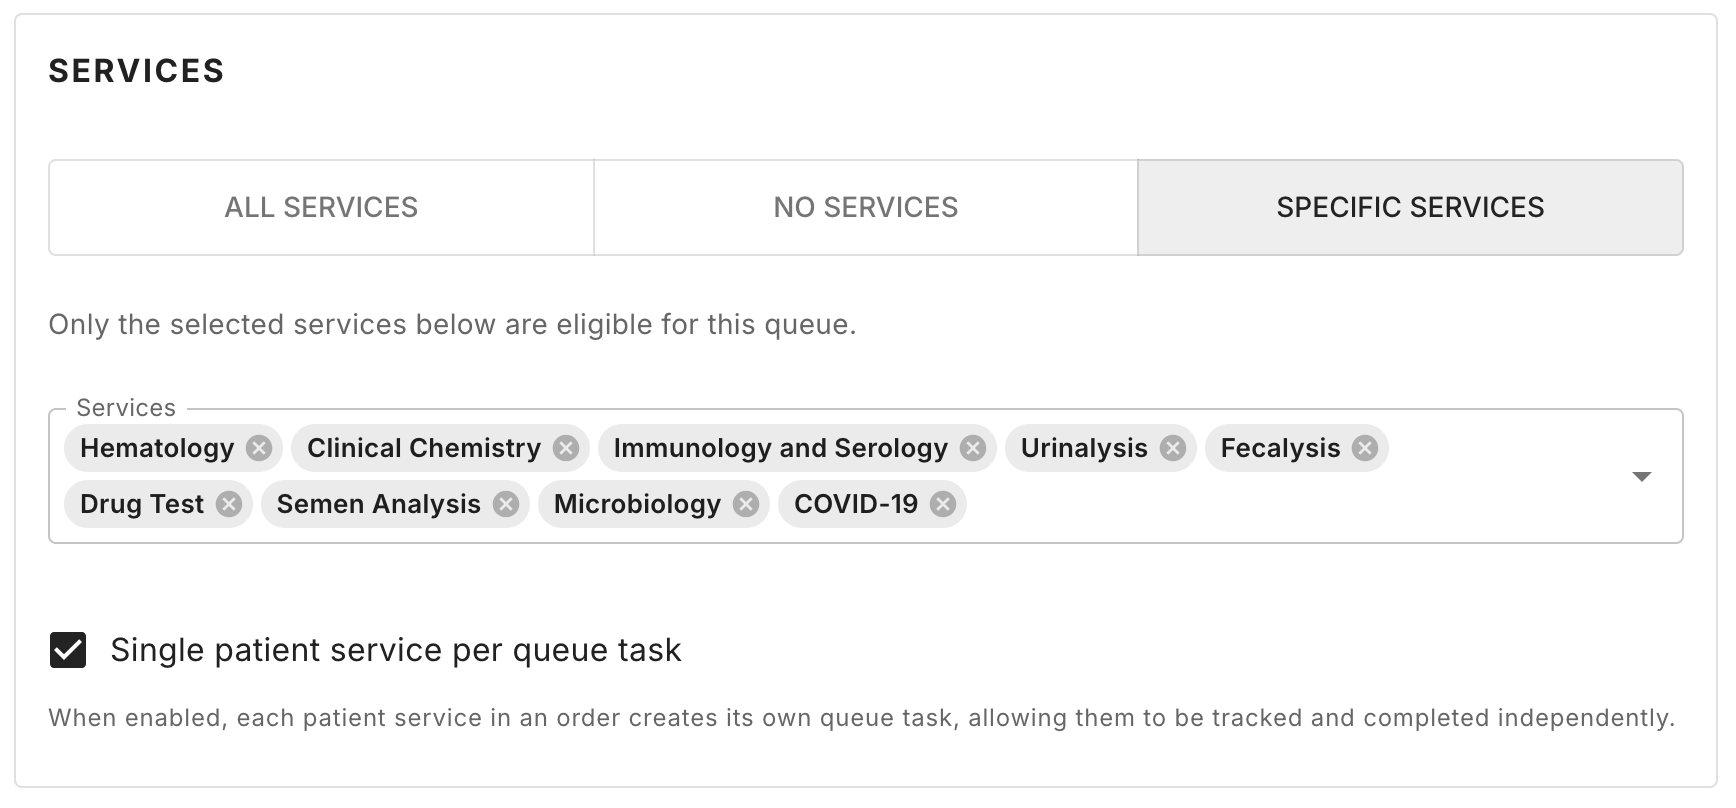
Services

  • Services: Choose which patient services can be accessed through any particular queue server

  • Single patient service per queue task: Create one separate queue task per patient service

  • These settings can also be configured in Workflow

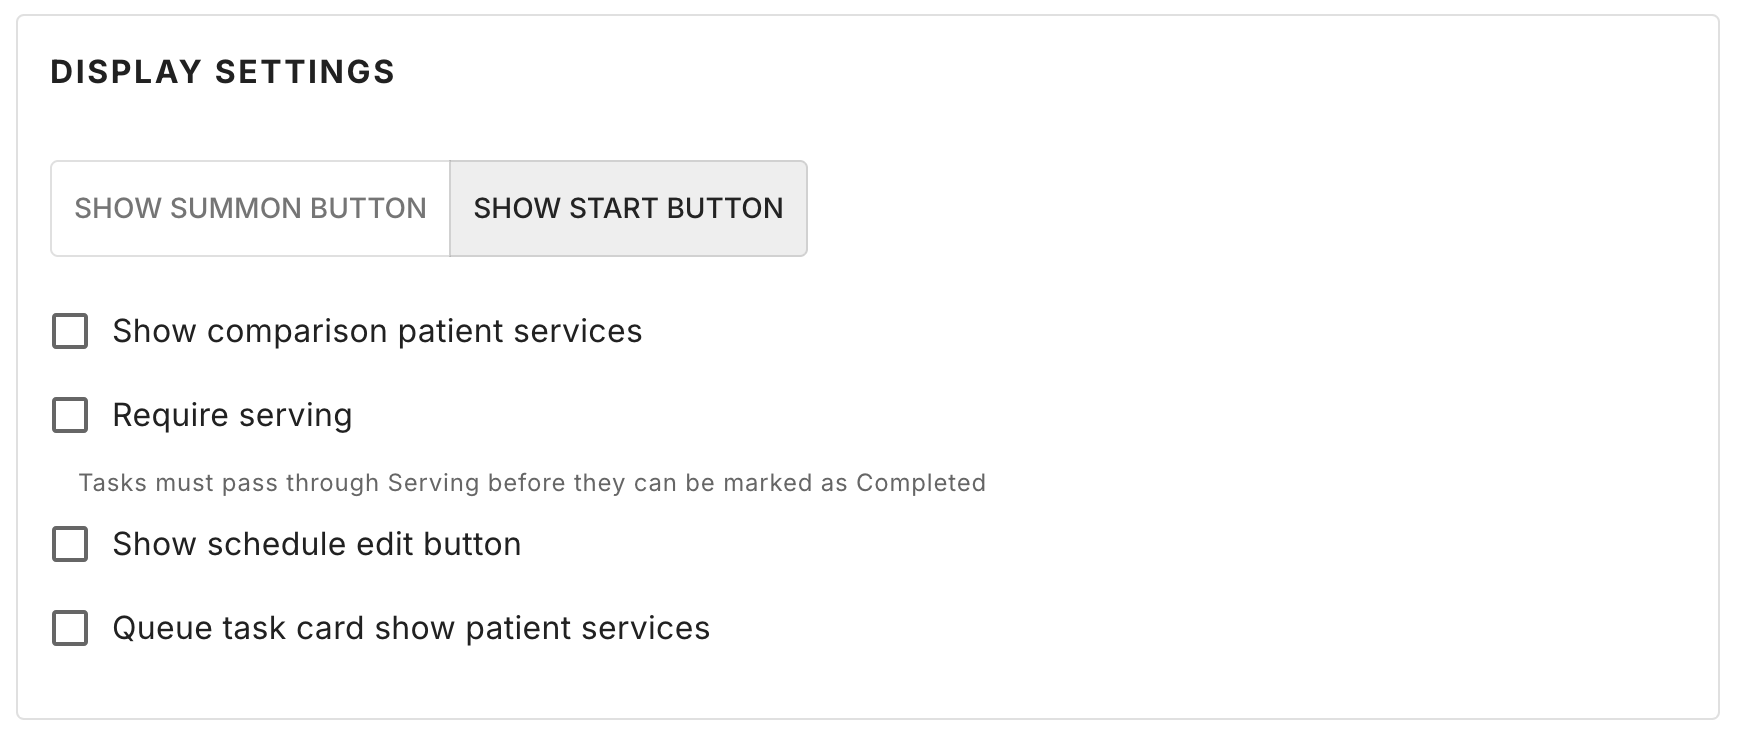
Display Settings

  • Show summon button: Shows summon button as "Call" in the queue task pane

  • Show start button: Shows summon button as "Start" in the queue task pane

  • Require serving: Queue task must first be set to "Serving" status before it be completed

  • Show schedule edit button: Surface button in action pane to edit schedule

  • Queue task card show patient services: Show patient services in the queue task pane

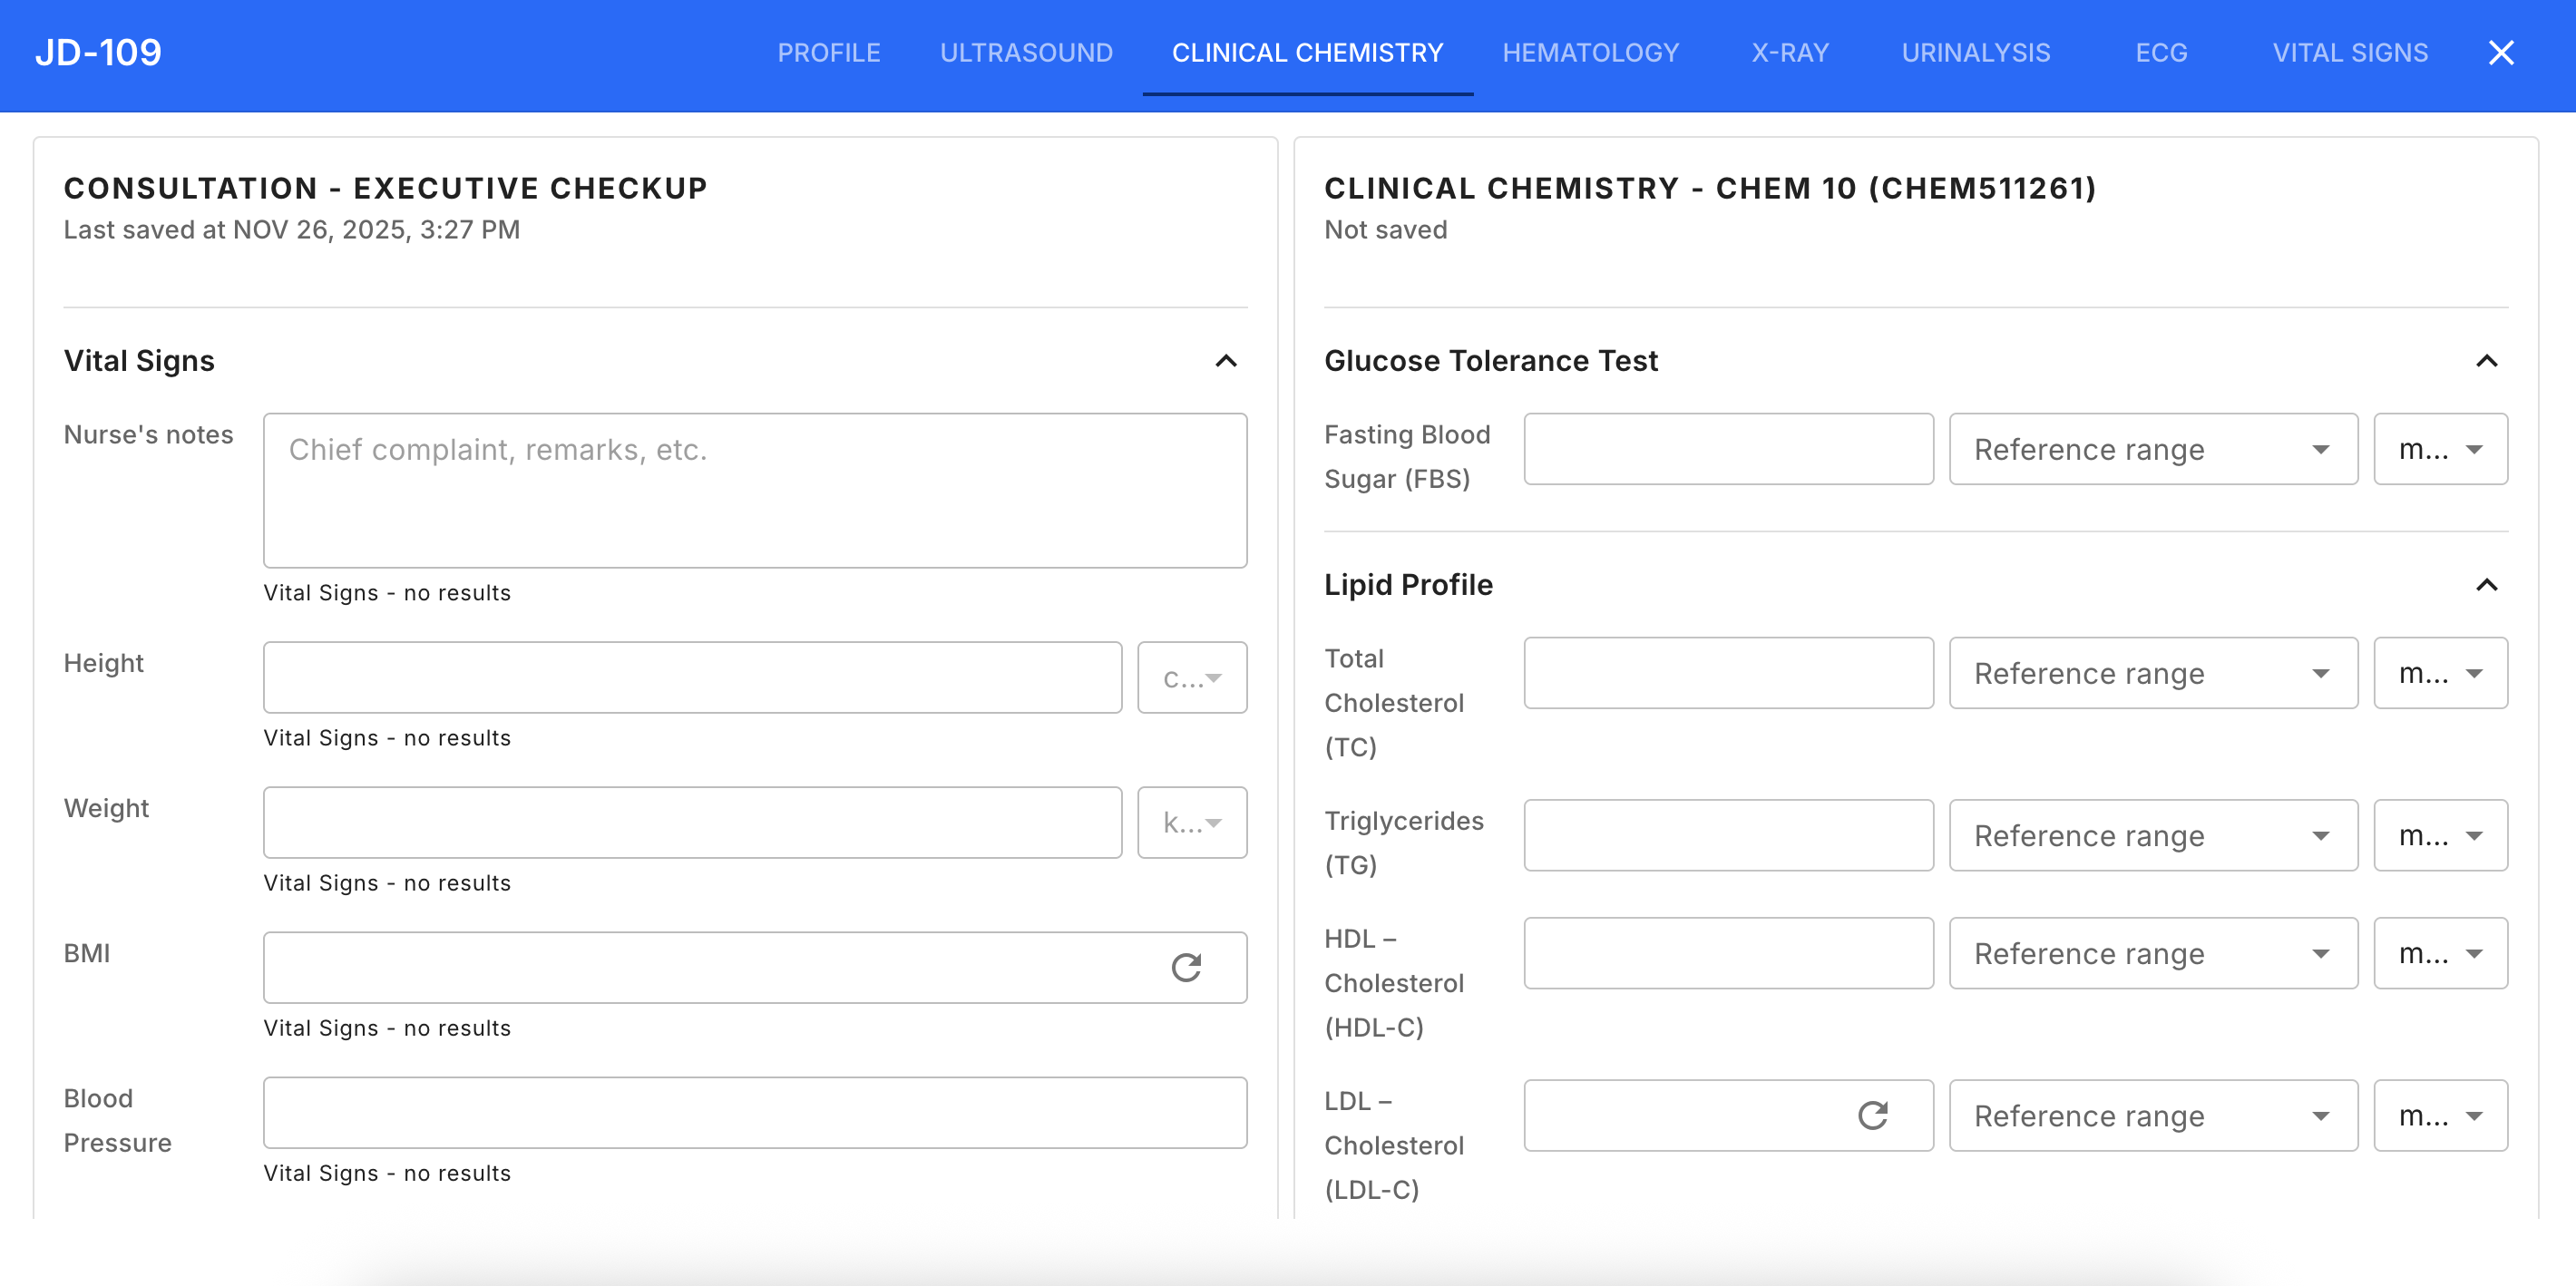
  • Show comparison patient services: View comparative patient services in two columns when opened from Patient Services widget (See image below)

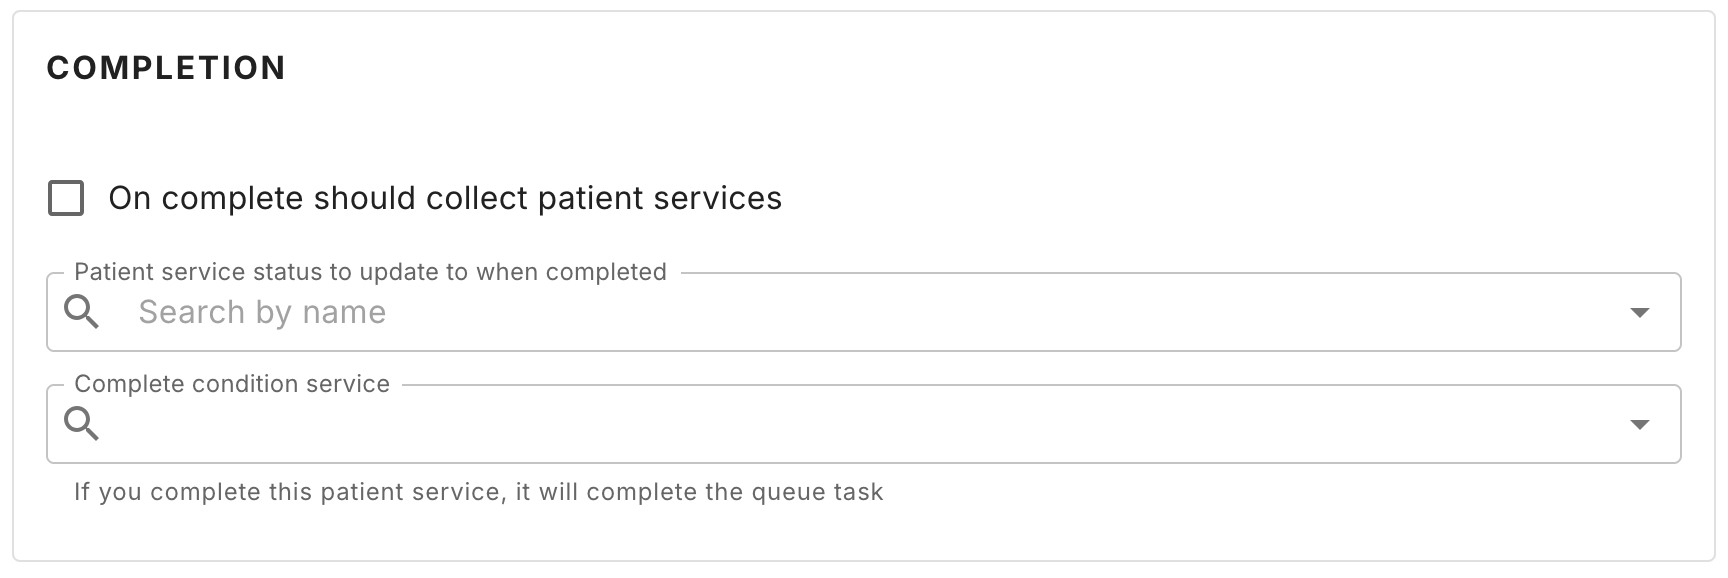
Completion

  • On complete should collect patient services: Allow user to complete queue task when patient services are collected

  • The rest are self-explanatory through the labels and helper text

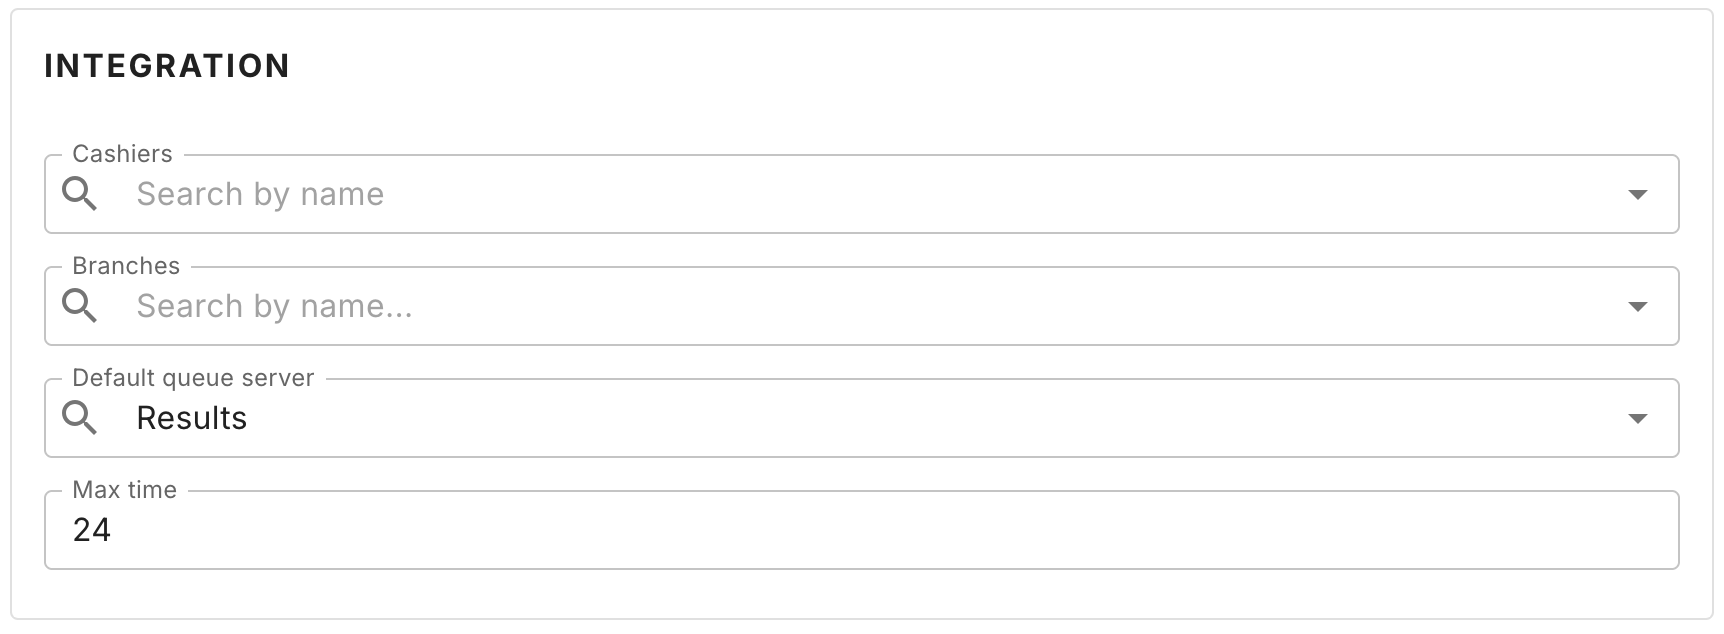
Integration

  • Cashiers: Adds the "load patient to cashier" button in action pane which allows users to quickly toggle to cashier page with the current patient loaded

  • Branches: Identifies which branches should have access to the queue server

  • Default queue server: Determines the queue server that is automatically assigned to the queue task upon creation

Last updated